I wanted to give a quick test run to my bones and craft paints.
I realized you can barely see any mold lines on the rats from the Dungeon Attack set that came with my bones, so I decided to paint them up. This saved me a lot of prep time, and meant I wasn't terribly invested in the minis, either. They're rats, for goodness' sake. If I give them a good base color and then glaze them with Army Painter Quickshade, I'm done.
The hydrophobic nature of the bones repelled my (fairly thin) Apple Barrel Colors Black paint.
But it took my Apple Barrel Colors Pewter Grey very easily.
Since I mostly paint over grey or black primer anyway, I decided to color the minis grey.
Admission time: I never thin my paints. I paint straight out of the bottle cap after a quick shake, and I only thin for washes or if the paint gets too thick from age or heat. Otherwise, I don't care to thin them. So painting the bones with "straight" paint was normal for me.
All-in-all, it worked well. It took 2-3 attempts to get everywhere, mostly because I worked quickly and didn't always check my work to ensure I got everywhere.
I also wanted to try out bending the mini to get at nooks and crannies - it worked. The Bones bend and then go right back to their original pose. Nice.
The ABC paints didn't flake off when I flexed them, either, which makes me happy. "Dump them in a bag" is easier for transport than "put the in individual nooks in my transport cases."
Next up is some brown (with the grey giving a base to color the brown and give it something to stick to) or darker grey ('cuz I like grey rats) and then once that dries they get glazed and then sealed. I took some pictures, but I'll post them once I've gotten through the lot.
I'm enjoying this so far, and I've gotten most of the way through my preliminary trade pile. I just need to check my non-dupes to see what else I don't care to own.
Sunday, June 30, 2013
Friday, June 28, 2013
Stuff I like: Being A Better Player
Noisms linked to this over on his blog, and I can see it was written by the guy who started that reddit post that led lots of traffic to my blog. Although, oddly, not to the post that I wrote about being a better player.
In any case, I could live with this this. I'd be happy if my players read this and followed them. They aren't all necessarily, but they're all useful.
11 ways to be a better roleplayer
It's not that I'd ask all players to do all of them, all of the time. But there isn't much there that would bother me. And I do, personally, request that my players know the system yet let it go enough to just do stuff and see what happens. So I find it to be useful advice.
Related posts:
How to Be a Helpful GURPS Player During Combat
How to Be a Helpful GURPS Player During Combat II
Building a Better PC
Thursday, June 27, 2013
Why my orcs are fodder vs. DF characters
The other day, b-dog opined that orcs should really be tougher. I replied, basically, that they're fodder because the PCs are powerful, not because the orcs are weak.
This post makes constant reference to Dungeon Fantasy 15: Henchmen and Dungeon Fantasy 3: The Next Level, because I use them as the baseline for building my fodder, my NPCs, and my henchmen. This may read like an ad. It's not, really - I write for publication what I need for game, and that's why DF15 is so thoroughly suited to this approach.
Building the Fodder
The way I look at my DF world is that 62-point Bargain Henchmen are the "base" templates for normal but skilled NPCs. That's what your average soldier looks like (see, Guard), or your average dockworker or porter (Laborer), or your average professional butler type (Servant). Not the bottom of the barrel, but the baseline for what people are like when they're suited for and good at their profession.
125 pointers are the really good ones - the ones with real potential later on down the line, or who've reached a level of professional success. They aren't a dime a dozen, but they aren't exactly rare, either. They're likely to have the tough jobs as bodyguards, elite troops or sergeants, clergy in the local temple, minor wizards, etc. This guys make great henchmen, or great fresh faced delvers in a higher lethality/more dangerous game.
So I build my fodder by taking one of the Bargain Henchmen and bolting on the racial template. Not purchasing it with points from the template, but giving it to them for free. So this naturally makes a 10-point race's basic warrior less tough than a 50-point race's basic warrior.
So for example, I do something like this:
Orc Warrior: DF15 62-point Guard Template + Orc Racial Template
Tough Orc Warrior: DF15 125-point Brute Template + Orc Racial Template
Elite Orc Warrior/Chief/Champion: DF15 Brute + 50-60 extra points + Orc Racial Template
Specific individuals or groups might also come with a prefix, like Determined or Distorted (or suffix, like . . . from Hell) to make them just a bit (or a lot) tougher.
I might use "Squire" or "Skirmisher" or "Killer" instead, depending on the race. A highly organized group might be Squire-based, because they're more organized for war. A more sneaky backstabby group might be Killer-based, because they're more set for quiet murder. I also tweak the results that come out a little, within a range, to make the final NPCs a bit different from each other or to better suit their in-game role.
But so your average orc warrior is worth about 77 points (62 + 15 race). A similar quality ogre would be 102 points (62 + 40 race). And so on. Against a 0-point race (say, a human), coming out to (62 + 0), they have a bit of an edge.
Building the PCs
But the PCs aren't average.
Starting DF PCs are 250+50+5.
I hand out about 5 xp per session.
So you can look at DF PC as roughly equal to a 125+50+5 character (say, a 125-point DF15 template) with 25 successful expeditions under his belt.
Or as a 62+50+5 character (a 62-point DF15 bargain henchman) with 37.5 successful expeditions under his belt.
These aren't fresh-faced new guys. Or if they are, they're as fresh-faced as a first round draft pick - not experienced but the cream of the crop of new recruits. The best you can expect. They start out with a massive edge over the average orc.
Comparing the Two
So a basic orc warrior is a bit more powerful than a Bargain Henchman Guard. Against a front-line DF character, he's going to get smoked. He can't compete. Against a 125-pointer, he's dangerous although outmatched. Against a Bargain Henchmen, he's the odds-on favorite to win.
A tough or veteran orc warrior is closer to a Brute or Squire with the orc template added on for free. He's a tough fight but outmatched against a DF front liner. He's the odds-on favorite against a 125-pointer. Against Bargain Henchmen, he's going to win most of the time.
An orc leader-type, or champion, or elite warrior is probably more like a 187-point DFer, and can go nose-to-nose with a DF front liner for at least a short amount of time. Backed by lesser allies, and he's very dangerous.
If I make a 250+50+5 point orc, I'm saying this guy is like the best orc you can find, literally one in thousands and thousands of orcs, with a solid swath of experience under his belt - dozens of battles, wars, dangerous fights, and so on. He's not spawned out of the orc-lands by the hundreds; he's a tough survivor from a race of tough guys.
So how would it work if I ran a more normal, 100 or 150 point game?
Individual orc warriors would be only a little more effective against them than 50-75 point humans. That is, the PCs still have the edge because I gave them enough points to be exceptional.* But the orcs would be a riskier fight.
Of course, by DF standards Fodder is meant to be dangerous in numbers. These guys are. Their leaders get right up to Worthy, which means dangerous with more-or-less equal odds. The best of the orcs can step up to a starting DFer and make a credible threat of danger without needing to bring along a bunch of friends. Boss monsters are one-on-many tough, and it's a truly rare "fodder" race that qualifies (especially against 4-6 DF delvers.)
In a lower-point game, the Fodder is more like Worthy (equal odds, there is a good chance of a dead or incapacitated PC), and the Worthy are more like Bosses, and the Bosses are fights to avoid unless you've stacked the odds in your favor in every way possible.
Because of this, I'm pretty satisfied with my "fodder" types. They are a challenge to lesser PCs, but I deliberately gave the players better PCs.** And then I built the fodder so they'd be a credible threat in sufficient numbers, and so they'd be interesting (tactics, poison use, different magic approaches, etc.), and so they'd be different from each other. So far, so good.
* A lot of games make this "exceptional" nature part of the system - even old versions of D&D - you start at level 1, not "normal man." So I don't expect most PCs to expect a 50/50 chance of losing versus an orc.
** I've played many games of the "build up to greatness" type. That's a lot of fun. But part of the fun of this campaign is "let's skip right to being badasses." Which makes it even more fun when they're in danger, or when they encounter what in another game was a potential TPK and it's more like a OMV (one man victory.) It's part of the joy, to me, of DF - you get to swim with the sharks, and you're a shark too.
Wednesday, June 26, 2013
Bones - sorting tips
So I finally got through all of my Bones from the Kickstarter.
It took a while. Here is what I did to ensure I knew what was in (and not in) my Vampire box.
1) Downloaded, modified, and printed a copy of this handy spreadsheet from a Reaper Minis Forumite.
2) Opened up my laptop to http://greg.botch.com/bones/ so I could check mini by mini what's there. I found that a bit easier to use than the official one for the check-in.
3) Spread the minis out on the floor. One by one, picked out minis and check them off the list. I threw the ones I'd found into the Vampire box, the duplicates into a separate box and marked down "extra" on the spreadsheet.
4) Went through minis I couldn't ID using the spreadsheet - that helped me find the guys who are pictured slightly off-center on the webpage, or whose sculpt is photographed in a way that made it hard to see a truly defining characteristic.
5) Went through the official page to get numbers on the ones I was missing.
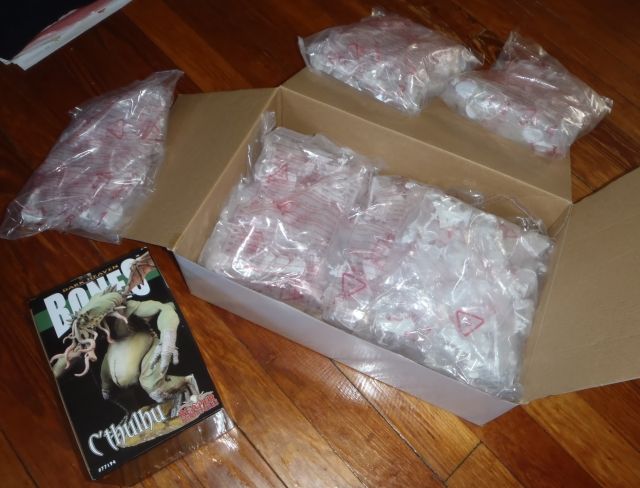
My add-ons were trivial (one monster pack with 3 monsters, one C'thulhu, one other monster) so I could just eyeball them.
Overall, I got a bum box. Really. Lots of stuff was missing. I ended up with 29 missing line items totally 42 minis. But, I also ended up with 37 duplicates!
The good part of that is Reaper doesn't want them back - it says so on the packing slip. The bad part is while they will replace the missing ones, I have to wait until the regular shipments are over. Fair enough, they want to get everyone's stuff out the door. I have no doubt they'll get to me and get the minis back - they've always shown top-notch customer service in the past, often going above and beyond what I'd expect.*
So I will need to wait some more. Sigh. I'm not disappointed but it was frustrating to figure out which mini was in each of those unmarked plastic bags and then try to figure out what was missing.
The question is, what to do with the minis?
I have some duplicates I don't need, and I have a number of non-duplicates I don't want either. Trade? eBay? Save for later? I haven't decided. Some are really tough calls - I got an extra giant - do I trade him away, because I do actually have a bunch of giants already? Or do I keep him, because then I can have an epic giant fight?
I also got some duplicates I can really use - extra golems, double-up on the Pathfinder goblins (hell yeah!), some extra fighters that look generic enough. Even an extra Ape-X, which is another clear "Epic cyborg ape fight or trade?" quandary.
Figuring out the "don't really want" pile is going to take a while! I am open to discussing trades, though, so I might post a "Not sure if I want these guys or not" page in a little while.
But yes, now we start to figure out what to paint first . . .
* Case in point, I bought a pack of spider minis. One had a malformed leg, so I contacted them. They sent me an entire blister pack of replacements for free.
Related Posts:
Bones, Primers, Sealers
Reaper Minis Bones Forum - lots of painting/prep advice for Bones
It took a while. Here is what I did to ensure I knew what was in (and not in) my Vampire box.
1) Downloaded, modified, and printed a copy of this handy spreadsheet from a Reaper Minis Forumite.
2) Opened up my laptop to http://greg.botch.com/bones/ so I could check mini by mini what's there. I found that a bit easier to use than the official one for the check-in.
3) Spread the minis out on the floor. One by one, picked out minis and check them off the list. I threw the ones I'd found into the Vampire box, the duplicates into a separate box and marked down "extra" on the spreadsheet.
4) Went through minis I couldn't ID using the spreadsheet - that helped me find the guys who are pictured slightly off-center on the webpage, or whose sculpt is photographed in a way that made it hard to see a truly defining characteristic.
5) Went through the official page to get numbers on the ones I was missing.
My add-ons were trivial (one monster pack with 3 monsters, one C'thulhu, one other monster) so I could just eyeball them.
Overall, I got a bum box. Really. Lots of stuff was missing. I ended up with 29 missing line items totally 42 minis. But, I also ended up with 37 duplicates!
The good part of that is Reaper doesn't want them back - it says so on the packing slip. The bad part is while they will replace the missing ones, I have to wait until the regular shipments are over. Fair enough, they want to get everyone's stuff out the door. I have no doubt they'll get to me and get the minis back - they've always shown top-notch customer service in the past, often going above and beyond what I'd expect.*
So I will need to wait some more. Sigh. I'm not disappointed but it was frustrating to figure out which mini was in each of those unmarked plastic bags and then try to figure out what was missing.
The question is, what to do with the minis?
I have some duplicates I don't need, and I have a number of non-duplicates I don't want either. Trade? eBay? Save for later? I haven't decided. Some are really tough calls - I got an extra giant - do I trade him away, because I do actually have a bunch of giants already? Or do I keep him, because then I can have an epic giant fight?
I also got some duplicates I can really use - extra golems, double-up on the Pathfinder goblins (hell yeah!), some extra fighters that look generic enough. Even an extra Ape-X, which is another clear "Epic cyborg ape fight or trade?" quandary.
Figuring out the "don't really want" pile is going to take a while! I am open to discussing trades, though, so I might post a "Not sure if I want these guys or not" page in a little while.
But yes, now we start to figure out what to paint first . . .
* Case in point, I bought a pack of spider minis. One had a malformed leg, so I contacted them. They sent me an entire blister pack of replacements for free.
Related Posts:
Bones, Primers, Sealers
Reaper Minis Bones Forum - lots of painting/prep advice for Bones
Tuesday, June 25, 2013
Bones, Primers, Sealers
Three things today:
Bones
My Reaper Bones came yesterday, so I've slotted some time today to go through them and make sure it's all there. The add-ons are, for sure - including my 9" tall C'thulhu! Not sure yet what I'll do with that, although I do have stats for him in GURPS already.
I got a Vampire pledge and a couple add-ins instead of Sophie (I don't collect the models of her, and I don't need a naked succubus on a motorcycle). So I have a lot of plastic here - more than 6 1/2 pounds of it. I have - aside from add ons - 240 minis to get through and check. I do want to make sure nothing is missing ASAP. And then I can start sorting aside the ones I have no use for, for trade or sale.

So yeah, it's "sort and check them off the list" day here. We'll see if I get through it before I need to do actual work.
Primer
Apparently I'm not supposed to need to prime my Bones, but we'll see how that works out with my sloppy painting skills and cheap craft paints.
But I just posted something on the primers I use on d20 Dark Ages, so I'll post it here, too.
Here is what I use:
White - Rustoleum Painter's Touch Sandable Primer #1981
Gray - Rustoleum Painter's Touch Sandable Primer #1980
Black - either Varsity Fast Drying Primer P-1147
OR
Brite Touch General Purpose Primer BT50
Sealers
I'm a big fan of layered sealers, so here is what I use:
Shiny stuff:
Rustoleum Matte Clear #1902 (says "matte" but it's just "low gloss.")
I put a layer of that on anything I painted but didn't dip or coat with Quickshade.
Matte stuff:
Testor's Flat (Lusterless) Dullcote 1260
Army Painter Anti-Shine Matte Varnish
I highly recommend the Army Painter stuff - it's not expensive for its size (roughly $12 for 400 ml aka a full-size can) and it doesn't turn your mini to snow.
Okay, back to sorting the bones . . .
Update!
Check the comments below for my post-sort update.
Bones
My Reaper Bones came yesterday, so I've slotted some time today to go through them and make sure it's all there. The add-ons are, for sure - including my 9" tall C'thulhu! Not sure yet what I'll do with that, although I do have stats for him in GURPS already.
I got a Vampire pledge and a couple add-ins instead of Sophie (I don't collect the models of her, and I don't need a naked succubus on a motorcycle). So I have a lot of plastic here - more than 6 1/2 pounds of it. I have - aside from add ons - 240 minis to get through and check. I do want to make sure nothing is missing ASAP. And then I can start sorting aside the ones I have no use for, for trade or sale.
So yeah, it's "sort and check them off the list" day here. We'll see if I get through it before I need to do actual work.
Primer
Apparently I'm not supposed to need to prime my Bones, but we'll see how that works out with my sloppy painting skills and cheap craft paints.
But I just posted something on the primers I use on d20 Dark Ages, so I'll post it here, too.
Here is what I use:
White - Rustoleum Painter's Touch Sandable Primer #1981
Gray - Rustoleum Painter's Touch Sandable Primer #1980
Black - either Varsity Fast Drying Primer P-1147
OR
Brite Touch General Purpose Primer BT50
Sealers
I'm a big fan of layered sealers, so here is what I use:
Shiny stuff:
Rustoleum Matte Clear #1902 (says "matte" but it's just "low gloss.")
I put a layer of that on anything I painted but didn't dip or coat with Quickshade.
Matte stuff:
Testor's Flat (Lusterless) Dullcote 1260
Army Painter Anti-Shine Matte Varnish
I highly recommend the Army Painter stuff - it's not expensive for its size (roughly $12 for 400 ml aka a full-size can) and it doesn't turn your mini to snow.
Okay, back to sorting the bones . . .
Update!
Check the comments below for my post-sort update.
Monday, June 24, 2013
Pictures, Other Adventuring Parties, and Orcs in Formation
Yesterday's game was a lot of fun.
Here are some reflections on it.
Picture time!
I snapped one picture yesterday. I really should do more during the big brawls.

The two counters in front and behind the party are the magically created servants they use as pack mules and trap-triggers and extra light sources. Red Raggi is up front, Galen is backing him up, Dryst is out to the right, and then behind him is Father Hans. We used Inquisitor Marco's former mini because despite carrying two cases of minis to the game I had like one guy who fit the cleric's loadout. Sigh. I'll have another one for next time.
The orcs are mostly Reaper DHL, often accessorized with Mordheim warband bitz, plus one Dwarven Forge orc my players bought me years back for Christmas. I painted all of the others except that guy and the orc with a spear on the hex base. He was a super-cheap eBay pickup, and I can always use another painted orc.
Monsters
Paraphrasing here: "We can't fight them again. We already used up that monster."
That's when I joked that my Pathfinder gargoyle collection means that level 3 is "the Gargoyle level." Damned if I'm not using all of my minis again and again.
Speaking of which, I used different orcs for all of the fights. One fight didn't get mapped, so I ended up using 22 different orc minis that game. I have at least 50 of them painted, so I can keep that up. I just need more shaman-types.
So by this theory of "keep using my minis over and over", there needs to be a gargoyle level, an orc level, a spider level, an ape level, a pirate level, a horde pygmy level, a zombie level . . .
Somewhere in the session the "Slime Level" was invented. We called the blocked-and-locked door they bypasses the entrance to the Village of Slime - it's level 2.5. I said "They only have liquid treasure - isn't Treasure Type S all potions?" "It's Treasure Type Y - for Yuck!"
Other Adventuring Parties
So I finally remembered to poll my players about allowing other adventurers into the dungeon. After all, it's the dungeon I made but it's equally their campaign. The two guys I had there yesterday were fine with it - as long as the dead remains of the other adventurers stayed in the dungeon so they could be looted. Heh. I still have another 5 guys to ask, though. If they say yes, I may start to run people through Felltower online. That's still a ways out though, and it's not like I have holes in my schedule around anything near a real gaming time.
Orcs in Formation
So yesterday the PCs finally hit the orcs when they had a chance to organize - as in, not on patrol and being ambushed by the PCs or in a chance encounter. The orcs lined up, shields in front, long weapons in back. They used the Teamwork perk to form up. They put their archers on the flanks with a clear line of fire. They put their shaman and leader in the back, and importantly put their ogre in the back to hurl giant spears instead of trying to play skill vs. skill games with armored foes.
In short, cannon fodder up front, assets in back, and organized formations to cover their buddies and ensure mutual support.
They still died horribly.
But some of that was bad die rolls (seriously bad ones on damage, and in one fight five attacks at effective skill 14+ all missed), good luck by the PCs (lots of crits), and being badly overmatched. As in, the strongest orcs aren't one-on-one or even two-on-one as tough as the PCs. Even more so, although they poisoned all of their weaponry (well, except the ogre's spears), the only PCs to get hurt shrugged off the poison with solid HT rolls.
Add in smart PC tactics - such as the scout shooting arrows at shield-armed foes to get them to Block so Raggi could force them to Parry and Dodge if he hit twice, or keeping their own formation tight enough for support - and it wasn't close.
But it was cool, and made for fun encounters. It wasn't boring, and it made the orcs for an interesting fight. I think it'll keep the orcs as potentially dangerous fodder. Although they were able to smear the orcs the players still felt like letting them ambush them or get in behind them was a monumentally bad idea. I think that's a win for me as the GM. Fun + challenge = good result.
Sunday, June 23, 2013
DF Campaign Session 27 - Felltower 18
June 23rd, 2013
Characters: (approximate net point total)
Dryst, halfling wizard (2576 points)
Father Hans, human cleric (?? points, NPC)
Galen Longtread, human scout (300 points)
Red Raggi, human berserker (?? points, NPC)
Still in town:
Borriz, dwarven knight (310 points)
Christoph, human scout (258 points)
Chuck Morris, human martial artist (251 points)
Honus Honusson, human barbarian (292 points)
Vryce, human knight (346 points)
Really light turnout today. Between some scheduling conflicts and illness and other issues, only two guys showed up - and one of them had to leave for a few hours of work right in the middle and then come back. If that seems odd, well, we play at his house so he'd come back anyway.
I ruled that Raggi was available without a roll, because it would be a major issue if he wasn't - enough to spell the difference between "Of course we go into the dungeon" and "What should we do?"
They also managed to locate a healing cleric hireling, which they'd asked for last time and I'd totally forgotten to stat up. Pre-gen NPCs in DFA1 to the rescue, and Father Hans was available and willing to enter the dungeon for a small fee.
That done, they got some rumors (about an enchanter taking residence up in the dungeon, about grey-and-brown bodied giant spiders whose poison eats through armor, and that the best way to kill a gas demon is with a wind jet) and headed out, crossing Stone Bridge across Silver River, to Sterick's Landing and past the statue of Sterick the Red, self-proclaimed Baron, and up to the ruins. They created their light stones (Dryst rolling yet another of his endless critical failures, this time negated by his recent purchased of Magical Stability) and headed in.
They found that the main entrance to the ruins had been traversed - both side portcullises were up, the doors were spiked open, and the pit was full to the top with broken rubble from outside and fascia made of bracken and such. They put down their bridge after some scouting and headed in.
First stop was the four-way room near the otyugh's pit. It was wet, as usual, with drag marks back to its lair. They left it alone and explored some nearby areas to fill in their map - finding the place they'd first fought the wights, finding the gargoyles again (this time they backed off and left the party alone),
We had a discussion at this point about Dryst's long-term plan to use the Enslave spell to get a gargoyle ally. And just how expensive it would be on an SM+3 otyugh, which otherwise they'd love to get on their side. (120 energy, and it's resisted)
After this they explored some areas they had bypassed. They hit a room full of caltrops with a sealed door in it. They cleared the caltrops (well, magical servants did with a magically created broom) and bashed the door down after forcing it failed. A draugr waited beyond, and attacked. It managed to carve Raggi up a bit but ate arrow after arrow from Galen while Raggi pounded on it. It eventually dropped.
They looted its armor and sword, and found its shield and armor were marked with the symbol of Baron Sterick's army. At first they though it mean a bodyguard but out-of-game I corrected them (their characters would know his regulars wore this symbol, his bodyguards special additional ones.) It had nothing else of value.
After this they headed down the long hallway they'd discovered a previous trip, and checked a few more rooms on the way, finding nothing but some signs of recent visitation. They also took a careful listen at the iron door that frustrated them that trip - they heard nothing, but Galen heard the sound of leather scraping against leather and a quiet footfall in another suite nearby. They geared up, Raggi kicked down the door, and they charged in - right into an orc ambush!
They were prepared for that, though, and although the orcs fought in formation and ranks with flanking archer support, it didn't help them much. Galen's arrows killed their archers in a split second, then shot down their horn-blowing sentry when he tried to wind the alarm. Raggi stepped in to face the seven other orcs and decapitated one of them with a maximum-damage neck shot (he hit and I rolled boxcars for damage.) Dryst zapped one with a lightning spell. then started in on Great Haste. Raggi then smashed into their ranks with his Cleaving Strike and rolled something like two max damage criticals and several near-maximum damage strikes. Galen kept shooting as well. The orcs died so fast Dryst never finished his spell before seven had died and three surrendered.
Galen took over at this point (Dryst's player headed in to work.) Raggi herded the prisoners to the side, Galen stabbed the wounded in the eye to finish them (he's a cold-hearded bastard, really), and Dryst used Wild Talent to cast Gift of Tongues. Then they interrogated the orcs. The foolish orcs were so happy not to be killed outright they didn't try to bargain, just answer questions. They provided a lot of information, including:
- they've moving in from overland and from "the caves" into "the tunnels downstairs" to take over, now that the goblins are gone.
- the goblins were wiped out by a smaller force in a couple of big fights.
- there are six fists of orcs in the area, including two patrols.
- they have two more apes in the area.
- there is a door downstairs right at the end of the hallway.
- they've never been past that metal door, the shamans told them it's forbidden and bad magic is there. Also, the shamans can't get in either.
- there are a lot of orcs tribes under one orc king.
Once it was clear they had nothing left to answer, Raggi asked if he should "make them safe to leave behind." Galen was all for that, so Raggi lined them up and went for a triple-decapitation. It didn't work but they were all fatally injured. Galen stabbed them each in the eye to finish the job, because Raggi didn't care to.
They took some loot and headed downstairs (for those counting at home, it was a 45-degree angle stair, roughly, and dropped down to a floor 30' below)
There they found a hex-shaped room with three doors and a statue in the middle, of a cone-hatted humanoid with its face covered, robes down to its feet, six-fingered hands, lobeless ears, and its left arm pointed to the door to the left. That door was barred shut, with a fairly recently added wooden bar. The door to the right showed no signs of traffic at all. The door head showed a lot. They headed that way, covering their lights and sending Galen to scout. He saw a bar on the far side, currently not in place, and a T-intersection.
To the left he head orcish voices echoing, not sure how far away. To the right he saw a chamber with six men carrying sickles, just standing there. A quick plan later and they got ready. Dryst ditched his servants and readied a lightning spell, and then Great Hasted Raggi. As soon as he slapped Raggi into action Raggi dropped the hand he'd used to cover his continual light stone and charged into the room. Galen opened up on the further of the six, putting an arrow into the heart of each. They took it and didn't flinch. The fight was on. Raggi charged and attacked, cutting down a couple but not killing them, and Galen kept his arrow attacks up. It was quickly clear these guys were fast, were constructs, and that luck wasn't on their side. Raggi critically failed and fumbled his axe, and then ate a sickle hit (the swing/impaling kind) and dropped prone. Galen kept shooting, and Raggi shot a double-leg takedown and then punched the corpse-golem (as they'd turn out to be) twice, rolling a ridiculous amount of damage and killing it. He ate more and more extremely high damage hits as he tried to get up, and although he took down another golem he was hit again and went below -HP. I rolled, and froze - we'd just been saying "Raggi rolls really well, but he'll probably die in some stupid anti-climactic way." "Yeah, like the scout sending him in to die." And there it was - a failed death check, missed by one, even counting Hard to Kill.
So I quickly flipped to Berserker in my notes - yes, the +4 also counts for death checks. That 15 wasn't a failure, it was a solid success by the margin of his HT + Berserk + Hard to Kill. He was out (he'd missed his consciousness roll with a 17) but not dead. Whew!
Raggi was down, and meanwhile Galen never missed with his arrows but only twice rolled better than 1 or 2 on his damage roll. He'd hit twice, and roll a 1 and a 2 for damage. Every time. This kept a lot of golems coming. Dryst blasted one down with lightning, and then charged up another spell. Galen blinded one with arrows to the eyes, and then Dryst zapped it and Father Hans whacked it with his mace and finished it. Galen's arrows did for the others, the 3 or so Raggi hadn't killed.
After the fight they patched up Raggi with Faith Healing and a bunch of potions, and headed further down the corridor, despite the risk of being cut off by orcs. They checked a small side room, and as they left, they were attacked. Three trigers (three-headed tigers) jumped them from behind!
One killed the trailing servant, and one each tackled and mauled Dryst and Father Hans. Galen and Raggi turned and attacked, quickly dispatching one triger and wounding another. But Dryst was mauled again, and had to make a death check - and Galen's player had to roll it as Dryst's player wasn't there. He needed a 12 or less, and rolled - 6, 3 . . . and 3. Made it, barely! More arrows and more axe blows and the trigers were dispatched and faded into smoke - summoned creatures of some kind. With their priest badly injured, Raggi hurt (he was hurt every fight), and Dryst near death, they couldn't stick around. They poured potions into the priest, stabilized Dryst magically, and then scooped him up and headed out. They left most of their loot from the orcs and draugr there, taking only the coins and the (more valuable) swords. They fled to the first level, taking some arrow fire from orcs (Galen shot back into the darkness but didn't hit anything.)
There, they found rats and giant rats were into the orc corpses, so they fled up the corridor and found a room to hide in. They covered their lights and waited. They soon heard orcs killed the rats and kicking down doors. So they waited, quietly and in the dark. When their door was kicked open, they uncovered their lights, Great Hasted Galen, and attacked. Eight orcs waited outside, armed and ready - and died in seconds. Galen didn't miss much, Raggi didn't miss at all, and the orcs died hard and fast. A couple tried to run but were shot down with arrows. The group looted them and headed off in pursuit.
"Nobody summoned creatures to maul Dryst and lives!"
So they headed downstairs, and over were the orcs came from. They passed a room padlocked and barred from the outside ("Treasury?" "You don't bar your treasure inside the room.") The next door their servant opened, and a swinging pointy log trap with bells on it splattered him and forced Raggi and Galen to jump aside.
The bells presaged doors banging open and a two-way orc ambush, but again, they were ready for it (and frankly were looking for it). Two ranks of big, brute-sized orcs, backed by a leader and an ogre hurling spears, faced them. Raggi charged when Galen told him "Kill!" and found he was in defilade from orc archers and a shaman.
What followed was a pretty good fight. The orcs fought in ranks, shield guys in front and polerms (and a long axe) in the back rank, arrows from the flank, lightning spells from the flank, and their leader using his large shield to cover a spear-throwing ogre. They did well, although some piss-poor damage rolls when they hit Raggi meant even their envenomed bodkin arrows didn't penetrate and a few botched defenses and a critical hit or two meant they couldn't stop Galen's arrows. But Raggi was critically hit by a spear from the ogre and badly injured (although he didn't go berserk), and Galen knocked down and out by a high-damage hit. He was awakened by Dryst with an Awaken spell stone, healed by Father Hans, and hit with a Great Haste spell by Dryst. Then they started to mow down the orcs despite their team tactics and mutually supporting positions.
Galen shot down the leader with four arrows to the face - he stopped one and ate three and dropped. When the ogre charged he ate four arrows to the face as well and dropped, dead.
Raggi charged the archers and shaman and once again used Cleaving Strike to cut a few down, decapitating two (two instant-kill extremely high damage rolls in a row, to Neck), sucking up a lightning strike (the shaman rolled abysmal damage), and then killing the shaman with the old standard mage-buster, the Defense Swamp (AOA Double, one as a Rapid Strike - Shaman Iron Armed one, Dodged one, failed to Dodge the other, and took max damage). The sole remaining orc archer tried to run and ate four arrows as well, each of which did enough to incapacitate him.
Some quick looting and room searching followed, but the group was in a rush to leave. They did find a room with a scorched floor, walls, and ceiling, with a sack in the corner and scrawling writing in orcish - something about magic. So Raggi headed in to the sack and Dryst cast "Gift of Letters" to read it.
WOOOOOSH.
The whole place erupted in flames! Dryst cast Extinguish Fire before the flames could do more than singe him, and saved the day. Then he read the sign - it said "Danger! Magic Bad Here!" Sigh. Yeah. But at least the sack had some loot in it (as well as someone's lunch).
Atfer this, they basically backtracked to the surface, with a profitable trip in the bag and everyone pretty low on healing potions, energy reserves, and interest in pushing it further.
They passed close to the otyugh on the way out, and Father Hans felt the sudden conviction that some poor soul was stuck down that short hallways there! We really need to go in there and (YANK!) - Raggi grabs him by the neck and says "No, there's an otyugh in there. Ignore it and let's go."
They got back to town, divided up the loot three ways, payed Father Hans a bonus, and spent the assorted copper coins they'd found (and were too lazy to money-change) on a big booze fest.
Good session.
Notes:
- They gave Raggi MVP on the "we couldn't have won all six fights without him" principle.
- Apropos our Enslave discussion, I said I was 100% okay with them abusing it to get monster allies. However, I nixed part of the spell I never liked - the using the eyes and ears of the Enslaved creature to see/hear from. It doesn't make sense based on the lesser versions of the spell (Loyalty, Charm) and makes it too much. I'm fine with the mental communication aspect, powerful as it is - although equally, it seems to have no precedent in the lesser versions of the spell. Enslave has a lot of "also this extra cool stuff" in it - isn't suicidally total loyalty permanently good enough? I think so.
- it's important to remember all the modifiers for death checks and HT rolls. Galen forgot he had Fit on his first roll to wake up with Awaken. Then Dryst's player said "Put Fit on your list of things to buy - then you'd had a +1 to HT rolls." "Hey, I have Fit." Me: "Then you made your roll. You wake up."
- Faith Healing is very powerful - 1 FP per 2 HP healed (works out to 4 HP for 20 HP Raggi) and no mention at all of multipliers for size. So healing Raggi 28 points cost only 7 FP for the priest. Wow! First time in my GURPS life anyone ever used that advantage so I had to look it up and walk though it, and it's well worth the cost if you've got a big guy to heal.
- Raggi's rolls are no less than silly sometimes. He rolled 15+ damage maybe 1/3 of the time this session, and as always did near-maximum or actually did maximum damage on a strike immediately following taking damage from someone. Three max-damage criticals and at least 3 normal strikes rolling 18 on 3d this session . . . geez. He did have one bad moment, though - hit someone for 4 damage on 3d. Plus 7, of course, for 11 cutting to the body, still enough for a major wound and stunning and knockdown.
- Cleaving Strike is an awesome choice for a berserker. AOA Strong with multiple targets, provided you knock them down or back? Yeah, that's for Raggi.
- We got through a lot of exploration and six fights tonight (orcs three times, corpse-golems, trigers, druagr) and a lot of looting.
- the otyugh and its empathic attempts to convince prey to come close is starting to get really funny.
- An NPC Healbot is handy. A PC would be better, but this guy is okay. They better hope he's available.
- Again, not a huge haul at all - something like 1700~ sp each. Profitable, but not a big haul. Still they're getting closer to things of real interest.
Saturday, June 22, 2013
Free Stuff I like: Magical Medieval City Guide
Here is a quick look at something free that I like.
A Magical Medieval City Guide is a FREE PDF over on SJG's e23.
It's 40 pages of city-making goodness.
It does assume a bit of a magical economy, and so it fits most smoothly into a D&D-ish "I pop down to the magic store for some potions and a Continual Light spell" kind of game. But it's not so thoroughly so that it's useless for a less-freely-purchasable magic economy.
But in general, it's an excellent look at a European-style city with magic as an assumed reality. It gives you:
- a good explanation of guilds (and why "the mage down the street undercuts my prices" wouldn't be an issue)
- a good explanation of city rents to the lord, and the whole big city vs. peasants/serfs are tied to the land tension.
- how trade and pricing works
- city politics
- and lots of other little bits along those lines.
It's 40 pages, it's free, and it's easy to read and easy to reference. If you want to put together a city that feels pretty solid, this is a great reference point.
Thursday, June 20, 2013
Stuff Other DFers Are Using That I'm Not
A cursory look at other people's Dungeon Fantasy games makes me think I'm actually in the minority on a lot of things. Especially in the things I don't use in my games.
What am I not using that all the cool DFers are using?
Armor from Low-Tech - We don't use the armor from Low-Tech, despite my long history of using Dan Howard's armor writeups in my own (prior) games and being a co-author on the book.
We came very close on this one. I had a handy list of LT-derived armor, and we used it in our playtest of Mirror of the Fire Demon. But in the end, the ability to use Loadouts straight out of the box, the ability to just pick-and-click on Basic Set armor in GCA, and deep familiarity with the rules and options led me to stay with Basic Set armor. I really didn't want to lose all of the ease-of-use, nor did I want to open the door to rewarding the players with the free time to compile a list of their best options by cost and weight. At least half of my players have no time to be figuring out the best options and I didn't want to do it either.
Short version: Good stuff, but required work. Didn't want to do work.
Imbuements - We don't use imbuements. Nor what comes with it, the Mystic Knight. Heck, I was a playtester on this book and I don't use it. Unbalanced? Not at all. Adds a lot of complication and makes the game more Kewl Powerz than I'd like.
Don't get me wrong - this is very, very cool stuff. I love that book. But adding it would put a learning curve (and an unknown power curve) into what was supposed to be a "let's kill monsters until we get bored doing that" dungeon bashing game. And which still is. I'd like to find a way to use this in the future in another game, though.
Divine Favor - From reading Doug Cole's "I win automatically against undead and supernatural evil" experiences with Cadmus, I'm glad I didn't go with this. I see the attraction on this, but honestly, I'm fine with the basic GURPS Magic system for healing and priestly spells. So this takes care of Antoni Ten's excellent Dungeon Saints, too. Sadly.
Techniques - Again, kicking my own best work to the curb. We're not using techniques. The reason why is a line-development issue. DF doesn't use techniques. Power-Ups does have some advantages made from techniques, but you never get partly bought-off penalties. Either you Dual-Weapon Attack at -4/-4, or you've go Two-Weapon Fighting and you attack at -0/-0. Modifiers are all-or-nothing. I do allow people to attempt techniques, but you can't buy them up partly. And I discourage people from getting too cute; better to pick one or two and buy the appropriate power-up than to have a smorgasboard of options to slow play down.
And that's besides my limitations to race and profession in my campaign.
So I'm not using a lot of what I see others using. I see a lot of Diving Favor-using Imbued Mystic Knights with historically accurate customized armor and using cool techniques. But not a lot of that in my own game, for all of its house rulings and oddness. Oddly I think my "vanilla" game makes for a good testbed for stuff I can use in future professional writing for SJG. There isn't a lot of assumption of special powers, optional rules, or equipment and moves from other books.
Some things I am using - the weapons from Low-Tech (and the upward-revised damages on a few), some optional enhancements to DF from Pyramid, many cool combat rules from GURPS Martial Arts, etc.) but not some real biggies that seem very popular. But again, GURPS is a toolbox, and I don't use every tool every time I open up the box.
How about you guys? What does it seem like everyone is using except you in your own game?
By the way, Paul Stefko was the guest for an excellent intro-to-GURPS video interview, GURPS 101. It's good stuff, although I'll nitpick and say mail hasn't given reduced DR against impaling for a long time now.
Wednesday, June 19, 2013
Bones, finally?
I recently got a confirmation request to update my shipping address for my Bones Kickstarter pledge.
Finally!
I can't wait to get them. I haven't been painting much recently but I expect that'll change because I really need a few of those guys to spice up some upcoming encounters.
I realize from their updates one of the minis I ordered as an add-on was probably why I had to wait. Bummer, because it's one I though would be cool but honestly, I would have skipped it if I could have gotten my minis easier. And I chose it over another one (the frost wyrm) that I'm thinking I could actually get a lot more use out of. Oh well. ;)
Tuesday, June 18, 2013
Planning Encounter Tactics
Over on Delta's D&D Hotspot there is an article (with a PDF full of spoilers) with tactics for the enemies in D1 Descent into the Depths of the Earth.
Planning the enemy's tactics ahead of time is an old idea but a good idea. If wasn't for the tactical advice in A3 Assault on the Aerie of the Slave Lords I don't now that I would have known how to handle such high-level foes when I first ran it.
Leaving complex powers and in-depth tactical planning to a game-time decision isn't really such a good idea. It's too easy to remember too late that, oh yeah, the fire-men could have started chucking fireballs at 100 feet away and not wait until the PCs moved up, or that the drow had special detection abilities, or that the trolls should have driven their pet lizards ahead into melee while they move to the flanks. This is especially true for intelligent enemies. If the players are going to carefully hone their tactics just to survive in a hostile world, it's odd that the NPC party they encounter isn't doing (or didn't need to do) the same thing.
Here are some things I've done for this situation.
Have a rough idea - You don't need a hideously complicated plan. But you do need to know what the enemy will do first, second, and third. You'll need to know how they'll react to (likely) counter-attack by the PCs, or to specific attacks (i.e. they'll run from fire, or use their buckets of water).
Map It Out - Either on a battlemap if you use one, or on a piece of scrap paper, just sketch out what the enemies will do and where they'll be if alerted and if not.
Look it Up - Check on the enemies' special abilities, spells, or weaponry and make sure you understand how they work. This alone will prevent a lot of "oh, they could have just done [x] and avoided that whole disastrous defeat" issues.
Test it Out - This takes some time, but if the enemies supposedly have been doing this in the past you're going to want to detect any major flaws by giving it a try. If the hobgoblins guard a chasm crossed by a rope bridge and have successfully defend it for years, it's unsatisfying to find out you left them wide open to a simple area spell or left cover on the far side that nullifies their weapons. Give it a trial run, either against the PCs (if you're trying to get a specific challenge for the party) or against some generic foes they'd likely be used to fighting (if you're just probing for flaws.)
Beta-test it. Give it a going over.
Know if they're coordinated or not - If the enemies fight in coordination, great, know that and plan around it. If they're essentially chaotic and disorganized, know that too. Just because the bad guys aren't very coordinated or clever doesn't mean you don't need to think about it. We're talking about your plans to make your life easier as the GM, not saying that all enemies work in a coordinated fashion.
So maybe the orcs charge wildly while their supposed ally wizard throw area-effect spells on top of them, or one of the enemies runs forward screaming his battle cry. But it's worth knowing ahead of time what they're trying to accomplish even if they all have their own plans.
Know their reinforcement or fleeing options, if any - If there are more friendlies nearby, how do they summon them and when do they arrive? A force roster is your friend, here. If they have to run, where will they run to?
Get an Adversary Player - One way you can really make encounters more interesting is to get someone else uninvolved in your game to develop the enemy's tactics. This can really give the encounter a different flavor because the enemies react less like you, and instead act like someone else. If you've consciously or unconsciously got a tendency to deploy certain tactics or make certain moves, it's really surprisingly to the players if they encounter tactics with a very different mind behind them.
To top it off, if you're writing for other people - for publishing or just to post up somewhere - how you visualize the tactics of the enemies can make fascinating and inspiring reading. You don't want your readers to get stuck wondering "Why the heck do these guys do this?" or "What were they intended to be doing here?" when they look at your encounters.
Monday, June 17, 2013
Upgrading the GURPS Evaluate Manuever
The GURPS Evaluate manuever isn't particularly potent.
What does Evaluate give you now?
For each consecutive turn you take Evaluate, you get the following (italics means something from GURPS Martial Arts)
- a +1 on the next Attack, Feint, All-Out Attack, Committed Attack, Defensive Attack, or Move and Attack made against the person you Evaluate against.
- (optional) negate -1 in defense penalty from a Deceptive Attack or Feint from the person you've Evaluating (which doesn't "cost" your Evaluate, but goes away once you use it/lose it.)
- the same bonus to non-combat skills that benefit from close examination.
That's it, really. It's a melee version of Aim, largely, and while it does give some benefits they aren't that much compared to all the other things you could be doing - such as what Doug outlined here. And while it is a melee version of Aim, melee weapons don't suffer the built-in penalties for range that come with missile weapons, nor gain the Accuracy bonus for aiming - making an "Aim"-like maneuver less of a hit-or-not decision.
What else could it give you?
Since Evaluate is often ignored because of its relatively small benefits, what else could it do? Here are some options.
- Act as a Defensive Feint, too. In other words, also give a -1 to hit per level for the opponent who you are Evaluating.
(At a maximum, this would mean you could give an opponent -3 to hit you, negate -3 of penalties from Feint and Deceptive Attack, and give you a +3 when you finally retaliate. This could potential turn a Skill 18 guy following a Feint victory by 5 points and launching a Deceptive Attack -2 into an 11 or less to hit and only a -2 for you to defend if it lands, instead of 14 and -7.)
- Act as a focused version of All-Out Defend, giving a bonus to defend against the one attacker of +1/2 of your attack bonus, rounded up, for each turn you Evaluate (netting out to +1, +1, and +2). This would not "use up" the bonus, and would stack with bonuses from Feverish Defense. Using All-Out Defense would end your Evaluate and thus the bonus, so they could not stack. This would have no effect against any other attacker. Unlike All-Out Defense, this would affect any defense against an attack launched by the person you are evaluating, making it superior to AOD in a one-on-one duel assuming you have the luxury of 3+ seconds to Evaluate.
- Evaluate can give a random bonus - 1d6-3 per turn, minimum 1. You'd usually get a +1, but might get a +2 or +3 in one turn. This adds an element of chance and potentially let you fully Evaluate a target in only a single glance.
- Evaluate might be a Quick Contest, using your Per + your best Melee weapon skill versus the DX-based Melee weapon skill of your opponent. Your margin of victory, up to 3, is your Evaluate bonus. It lasts until you use it or stop taking Evaluate as your maneuver. You are aware of how much you notice, and can choose to re-roll the contest if you want a better result.
Out of all of those, I like the first two the best. It might be a little much to use all of them - if 3 turns of Evaluate gives a +3 to hit, -3 to be hit, +2 to defend, and negates 3 points of Feint and Deceptive Attack, it's a little too powerful. It would make a wary relative novice (skill 12) able to easily fend off the best moves of a skilled attacker (skill 18). But either of "minus to hit" (the free Defensive Feint) or "bonus to defend" (the focused AOD) would make Evaluate a really useful tool when you think you need to ensure you don't get hit until you've got a real chance to attack effectively. It also avoids tramping on AOD (which is still more useful against multiple foes, or right now) and Defensive Feints. I'm split on which one I like better - it might be useful to offer it as an option (you pick, either +1 to defend or -1 to be hit.)
Also importantly, it neither makes Evaluate free, nor makes All-Out Defense or Defensive Feint less useful. It's still better to All-Out Defend if you want to take advantage of multiple defenses, or get more move on a Dodge, or have multiple attackers (instead of the "featureless plain duel.")
I think in my own games I'll give one of those a try - probably the "+ to defend against one guy" version, and see how it works out.
Sunday, June 16, 2013
June Megadungeon Musings
Just my latest . . .
Megadungeon Musings!
Here's the status of my dungeon.
Mapping - I've mapped 11 levels or major sub-levels fully. I've stocked most of them.
Depth - I realized I don't need that deep of a dungeon. 17 levels? Nah. Not in a go-and-return-the-same-session game like I run. If it takes more than half the session to get there, they aren't likely to go. So a game like I run argues for a flatter, shallower dungeon (like the Black City) instead of a deep, deep dungeon. Easy access to multiple levels is a way around this, though.
Stocking - I've settled on using the Moldvay/Cook room stocking rolls. I think they work well enough. Especially for a first-pass "what's in the dungeon" kind of thing. It's also easy to remember so I don't need to consult some chart to see what my die rolls mean.
Monsters - I still pick monsters by hand, but sometimes generate prefixes randomly.
Treasure - I'm still futzing around with my treasure generator. As I've mentioned before, it's based on depth below the surface and modified by monster strength. The disconnect between monster and treasure is both good (you can find poor strong monsters and wealthy weak ones) and bad (same thing - a dragon with $5K in treasure and some fodder types with $100K). I think I need to tweak it some more but I haven't quite decided how.
I like this one at Dungeon of the Three Fools but it's got issues, like how to set the level (Is it monsters? Depth?) and the clear tie to D&D/AD&D valuing, which isn't how I play. Still it's something I would like. My still-in-alpha system generates a hoard value, but not hoard components. I'd love one of these for GURPS so I could just stock a dungeon level in minutes instead of hours.
(BTW, Dungeon of the Three Fools is a great name for an old-school megadungeon. You get what you deserve, going into a place like that.)
I'm thinking of giving bigger bonuses to Boss monsters on the result (since I determine the monster toughness and then its treasure) and bigger penalties to Fodder types, still normalizing at "Worthy."
I'm also thinking of some tweaks based on level depth. Right now it directly scales to level, which means rolling up treasure on level 6+ means there is usually quite a lot. This isn't necessarily bad, but it does mean "depth below" is critical and maybe it should be "challenge level of the area."
I know this is all pretty vague since I haven't shown the system, but once it's up for beta I may show a bit more. I'm hoping to make something publishable and SJG doesn't like to re-publish stuff that's up for free on some blog somewhere.
Traps - I'm still a big fan of traps. Here is a nice look back at Grimtooth's Traps (I have most of these, and I started with Too - and e23 has them.) But I'm plumbing some more reasonable sources for traps, like Traps & Treachery and the trap charts from Undermountain II.
I think my player's discovery of the use of Create Servant to create trap-trippers gives me a chance to really let go with some nastiness, because they're getting better at dealing with traps. I can level up the challenge, basically, to keep up with their cleverness.
All in all, I find drawing and stocking my dungeon a combo of fun, work, and relaxation. Coming up with the systems to make it more fun than work is more work than fun, though. Still, all in all, it's amusing stuff.
Friday, June 14, 2013
Another AOD optional rule
I originally posted this to Gaming Ballistic, but I didn't want to lose track of it.
Optional Rule: All-Out Defense and Feverish Defense
If you use the Feverish Defense option (see Extra Effort in Combat, p. 357), and you take All-Out Defense on the turn immediately following the effort, you recover the 1 FP spent on Feverish Defense. This can only recover 1 FP, regardless of how many times you used Feverish Defense (and regardless of whether the extra effort worked, or the defense succeeded), and only recover FP from Feverish Defense. FP recovery is not affected by any advantages or limited by disadvantages.
Up to 1 FP used for Feverish Defense used during your All-Out Defense can be recovered on the next turn if you continue to stay on All-Out Defense.
Notes: The idea is to increase the "knocked back onto the defensive" effect of attacks by rewarding you for staying on the defense.
For example, in play it might look like this:
So A goes.
B attacks A. A uses Feverish Defense to get a +2 to defend, pays 1 FP.
A goes again, and can either do whatever he wants, or does AOD (and automatically recovers the 1 FP spent on Feverish Defense.)
Thursday, June 13, 2013
Melee Academy: Getting the Most Out of All-Out Defense
You'd think that there would be only one way to use All-Out Defense - turtle up, hope for the best. But in fact there are some tactics to get the most out of it.
First, you need to choose your option.
Increased Defense - This option gives you a +2 to one specific defense.
Increase Parry is a good option if you have multiple parries and/or many parries at a low cascading penalty. For example, a fencing weapon, you're a Weapon Master or Trained By A Master, or a two-handed weapon (using the rules in GURPS Martial Arts), or more than one of the two. In this case you're not only buying a better parry but more parries before you drop to an unacceptably low defense roll.
This is also a great option if your opponents are unarmed and you are armed, or you're an expert in Aggressive Parry. In that case, you are buying both an improved defense but also getting in a free shot on the attacker (assuming you make your skill roll). It's also a nice choice if you've got a two-handed weapon and face two-weapon fighters, since Dual-Weapon Parry is so easy.
Finally, if you have Sacrificial Parry, take this option and lay out the defenses for yourself and for your nearby allies. With a well-designed defensive fighter, you can hold the center of three-man wedge with two more offensive companions, go with All-Out Defense (Increased Parry), and parry for three people at once. This turns AOD, especially against unarmed attackers, into a their-turn offensive move. This works even better with Parry Missile Weapons or against foes who can only attack at range with thrown weapons - again, easily parried.
You can do this sort of thing without All-Out Defense, but the +2 for using it is pretty sweet, and can spell the difference between "my allies are safe" and "my allies are probably safe." This is especially true with excellent defensive weapon (like a quarterstaff!) plus Weapon Master/Trained By A Master, since you end up with only a -1 for each consecutive parry. +2 is two bonus parries before you start reducing below your base Parry.
Increased Parry is also good if you need contact with an opponent for some kind of follow-on effect, such as a throw or arm lock on a following turn, aura attack, or merely to Beat his weapon aside.
Increased Block is kind of the red-headed stepchild here. It's not a bad choice if Block is your best chance to stop a specific attack, either for yourself, or, with the appropriate perks (Teamwork, Shield Wall Training, or Sacrificial Block), for someone else. Because the multiple block cascade is so harsh (-5 for each additional) it doesn't do much to increase your chances of getting off more than one block.
Increase Dodge allows movement up to 1/2 your Move score, too. This is great when you need to advance into missile fire but don't want to be hit. This is also great if you're planning to Sacrificial Dodge to protect a VIP - you can still move well and have a better shot at pulling off the defensive move you need to do your protection job.
Double Defense - When choosing Double as your defense option, remember that you have an unlimited number of unpenalized Dodges in GURPS. There are optional rules (such as Limiting Dodges, in GURPS Martial Arts) that give you a cumulative -1, but again, it's optional.
Your first choice of defenses should be Dodge, even if it's lower than your Parry or Block. There is no risk in trying it (other than critically failing and falling), and no cost. If it fails, then choose a second, different defense to try and stop the attack from landing.
This also assumes you are more concerned with avoiding the attack than getting some benefit from your initial defense (such as contact for a judo throw or arm lock, or aura attack, or aggressive parry). It also assumes you aren't at more risk for a critical failure or slipping and falling from some slick or unsteady footing. This also assumes you don't need to ensure the attack doesn't pass you by and hit people behind you. Be a team player - don't stand in the front rank and dodge missiles and let them hit the people in the second rank. If you've got people behind you to protect, go with Increased Defenses or use Parry and another Parry, or a Block and Parry combination, and don't let the attack get through.
Hopefully those tips will help you choose your best option, and make the most of All-Out Defense. They won't always apply, and in special circumstances you might need to make a different decision - but the tips above are a good place to start.
Related Post:
Another AOD Optional Rule
Wednesday, June 12, 2013
Calculating stair/level depth?
Does anyone have a quick tool (or guideline) for knowing how to determine how deep a staircase takes you, or how long it would need to be in order to go down X depth?
For example, I have stairs on level 1 that go down to level 2. It's a straight set of stairs, and I'd like there to be 20' vertical distance between level 1 and the floor of level two. How long does that set of stairs need to be with a reasonable rise and run?
And then, say, I have another set of stairs on level 1 that go down to level 2, but now they stop halfway and then have a landing and then double back. How long do these need to be?
I've found some rise/run calculators on carpentry sites but I'm finding it hard to figure out how to use them. Anyone have a quick-and-easy calculator or reasonable guide, if not an easy to use tool?
I've already plotted out my dungeons, but if I can fix them depth so it's consistently correct that would be lovely.
Tuesday, June 11, 2013
What do the players get to roll?
So the story I've heard is that back in the day Gary Gygax rolled all the dice behind his screen.
Some examples of play in early issues of Dragon and elsewhere did the same - the GM rolled.
In my games, the players roll a lot.
My basic philosophy is that your PC is your playing piece, your representative in the game. You get to roll for it. There is precious little in the game you can control, but you can get to do the rolls that determine your fate. You get to roll to discover the effects and results of your actions.
In my games, this includes but isn't limited to:
- your "to hit" rolls
- your damage rolls
- your defense rolls
- your resistance rolls
- most of your skill rolls (unless they're specifically meant to be rolled secretly in the game)
- your consciousness checks
- death checks
Back in my AD&D days, this was to hit rolls, damage rolls, and saving throws.
I won't always tell you what happens from your roll. You may deal out a triple-damage critical hit and roll 24 cutting damage, and you'll just have to wonder what's keeping the Black Knight still standing after that. But you'll have gotten your rolls.
I won't always tell you what you're rolling for. I might just say "Make a roll - you want to roll low." You get to make the determination, and know whether to cheer ("Yes! I got a 3!") or groan ("Aargh! 18.") "Everyone give me a roll. Roll low."
I'll even give advice on using Luck or not ("I got a 9, do I want to use Luck?" "Yeah, I think you better.")
But I won't take these away unless I absolutely have to. Even then, I'd prefer to let you make the roll even with concealed modifiers and concealed results.
Potential game-enders? I won't ever roll them for you. You always roll your death checks.
It's your guy, your fate should be in your own hands as much as possible.
As the GM, I get to roll for the rest of the game world.
You've got your one guy. Maybe your henchmen or hirelings, too.
But mostly one guy, and the rolls you make to find out how the decisions you made turn out.
And I hate to take that away.
Sunday, June 9, 2013
DF Campaign, Session 26 - The Gargoyle Menace Ended?
June 8th, 2013
Characters: (approximate net point total)
Dryst, halfling wizard (259 points)
John McShieldly, human shieldbearer (62 point NPC)
Chuck Morris, human martial artist (251 points)
Red Raggi, human berserker (?? points, NPC)
Vryce, human knight (346 points)
Still in town:
Borriz, dwarven knight (310 points)
Christoph, human scout (258 points)
Galen Longtread, human scout (296 points)
Honus Honusson, human barbarian (292 points)
Unfortunately, the players of Borriz, Honus, Christoph, and Galen couldn't make it. Neither could our new recruit (who'll start someday, hopefully.) So we were pretty short today - lucky for the group, they easily made the 12 or less roll to see if Raggi was there. He'd had a profitable trip last time, so he was celebrating.
The group gathered some rumors - one about how it's bad luck to kill a wizard (but good luck to capture one), and how this really nice gnome came to town to buy supplies (food, poison, caltrops, tripwires, needles, etc.) and bought a few rounds for the folks (reminding them of their trap-laying gnome "friend"). They also heard that there is a place in the dungeon where down is up and up is down, and that some monsters just form out of the darkness - snap - just like that.
They got their supplies and got down to business. Vryce got his fine sword enchanted, finally, laying out 5K to get it to Puissance +1, which is what is necessary to kill some creatures they've encountered. This would prove to be a life-saving enchantment this session. Dryst put out the coin to keep himself upkept in Dwarven rations, with also saved his life. They got Raggi, Chuck Morris, and a John McShieldy (same guy from last time) and headed up the mountain.
They went in via the bugbear tunnels from last time, crawling in through them on all fours once more. This time nothing molested them. They emerged into the dungeon proper and headed to a hallway they didn't check last time. It turned out to lead to an odd L-shaped room they'd visited long, long ago. It had some copper coins on the floor - they tried to grab them via a servant but he died when he touched them. They left them alone after that.
Next they burst into a room loaded with gargoyles, with a 25' arched ceiling. The gargoyles attacked, even as Chuck Morris asked to speak to their leader. They cawed and attacked. What resulted was a long brawl, in real terms and in game terms. It took at least an hour and a half to resolve the fight because of all fighters crammed into a small space and the tactics of the gargoyles (who tried and succeeded in drawing the group out, thanks to Raggi's impetuousness.)
But last time the gargoyles inflicted a lot of harm with no real casualties, since they couldn't be slain by the party members. Not this time - although there were more gargoyles (11 altogether, including their Ravenous fanged leader) the party had two fighters with magical weapons. That was enough to deliver actually killing blows. The gargoyles gave as well as they could but their claws, fangs, horns, and tails couldn't deliver real harm to any of the front line fighters. Chuck Morris got dumped on his butt after critically failing an acrobatic dodge, but quickly regained his feet to fight. They only occasionally managed a dive-bomb slam or a weapon hit. Dryst tried lightning but only mildly injured one, shocked himself with his own lightning in what was one of many critical spell failures this session, and then resorted to Great Haste on Vryce. Chuck Morris managed to get in a few really nice shots (he does 2d+8 cutting) but with a non-magic weapon he was really forced into an assistance slugging role.
Finally after a long fight half of the gargoyles went down, and the rest fled. Raggi slumped unconscious (he'd been badly wounded by a few weapon blows from armed gargoyles) and Vryce used his haste to drop his sword (it's lanyarded to his off-hand), ready a sling, then load it and drill the gargoyle leader as he fled the room, thanks to Luck and a good re-roll. He did just enough damage to put him down. Then he finished him with the sword. The others had flown off too fast for pursuit - "This ends the gargoyle menace" they proclaimed. Also, they talked about find the others next time and forcing them to serve them somehow (perhaps with bribes of gemstones.)
The searched the room and the nearby gargoyle "temple" as they call it (a room with a scratched-up statue torso on the floor), and rested. Meanwhile, they broke up the "dead" gargoyles to find their legendary diamond hearts. What legend is that? No idea, but they were sure. Instead they found fist-sized rocks - geodes, they (correctly) surmised. They collected them as loot, finding nothing else of value.
Next, they found the room led off through a short hallway to low rise stairs down and through a longer hallway. They took the stairs.
They found themselves in a strange colummned room a few feet below the surrounding rooms. It had four rows of columns, a mist-shrouded ceiling (Chuck Morris shimmied up one for a closer look), and walls of grey, purple, red, and black-shot stone. They slowly walked through it, and as they passed the fourth and final row of columns, their lead magical servant let out a shriek, huddled on the floor, and disappeared. They send Chuck Morris forward to investigate - he took a step, and a point of damage as he was hit with a psychic shriek, and stepped back.
Okay.
But they saw an altar and two archways to either side and a bit in from of the altar. On the altar were some dull-black candelabras in a lightning-bolt pattern and a chalice. All were decorated with pieces of black opal, obsidian, and jet. They decided they wanted them.
Plan one was to create a rope and grapnel, and Chuck Morris would throw it and hook the goodies. Lots of throws later, they decided this was taking too long and not working.
So they simply had Chuck Morris shuck down to minimal gear, and run to the alter and back. His base move is 9 (27 feet per second . . . ) so he ran there, grabbed, and back, taking 5 damage in the process. He did that twice.
Then Chuck checked the ceiling - hmm, no mist. Okay, that's bad, they decided, but in for a penny, in for a pound.
Then Dryst announced he could just use Apportation to hook the chalice with the grapnel. Thought of it a bit late, basically. So they did that, and got the chalice.
They loaded them up and headed out - only to find the two exits blocked by the mist. They sent a magical servant forward, but it got close to the mist, fell choking, and disappeared after croaking out "Not again" in a resigned tone.
Now what?
They checked for other exits and Chuck Morris found a little peephole above eye level. He pried it open with a dagger and saw a little spy cubby, with a secret door on the other side. He decided to pull the wall down through brute strength and the power of his chi. He spend a while doing so, but only succeeded in inflicting some minor damage. Then Vryce stepped in and started to pound it with his crowbar. But then the mists interceded. The mist broke up into four roughly man-sized pillars of sickly smoke. Two stayed in blocking positions and two zipped in quickly and began to poison and choke everyone nearby. Dryst stepped back and wracked his brains (even as he choked) to figure out what they were.
He knew - toxifiers, poisonous clouds of demonic smoke. Vulnerable to magical weapons and wind, but barely so thanks to their diffuse natures. Raggi and Vryce attacked with their magic weapons (Vrce at first with his undead slaying sword, not realizing at first they were demons, not ghosts).
This fight was a desperate slog, too - and for a while it looked like a TPK. The group was scattered, necessarily so, which was very lucky. It helped keep them from being surrounded and pasted with poisonous gas. Even so, Raggi was failing roll after roll and choking, barely able to get in his swings (many of which were dodged). Vryce alternatively choked, swiped with his sword, or chugged down healing potions. Chuck Morris limped along, low on FP from his Power Blow/Breaking Blow escape attempts, and suffered badly. John McShiedly, collapsed, near death. And Dryst's lightning did little to impress the demons. Now what?
Dryst busted out his Wild Talent (Spells only) and used Windstorm to create a whirlwind around himself. Despite his poison damage and nausea, he managed to get it off - mostly because of making a few resistance rolls by the margin his Dwarven rations-granted Resistance to Poison gave him! It couldn't harm the demons, but they couldn't penetrate it nor could their gas get through. He moved, slowly but steadily, to envelope McShiedly and Chuck Morris even as Vryce fought on and Raggi went down, poisoned and near death*.
Dryst decided that, attack spell or not, Purify Air was the way to go. On the fly I decided he was right, and let his spells work as a resisted spell (vs. HT) doing 1d damage. He managed to injure the demons quite a few times this way although one critical failure stunned him, and another created a field of poison gas that almost hurt Vryce and healed the demons.
It was a close fight, with Dryst and Chuck Morris crammed into the windstorm's eye, Raggi covered by the storm, and Vryce fighting around the outside as Dryst used Purify Air to try to hurt the toxifiers.
In the end all four demons fell and faded away, thanks to a steady pounding by a Great Hasted Vryce, who totally abandoned defense (AOA, all the time) to just rain Deceptive Attacks down on the toxifiers until they went down. They turned out the be very difficult to injure but not especially hardy, and not nimble enough to get away from steeply deceptive attacks.
Once they all went down, they rested in the room, and tried to heal up the injured. It took a lot of healing potions to get Raggi back up (he was at -38 from his starting 20 HP), and Chuck Morris back to healthy (he was negative), and Vryce used plenty in his fight. But as they nursed folks back, Vryce went to work bashing down the wall to the spy cubby. They got it sufficiently crumbled to get a servant in.
But they quickly found nothing but a moldering chair, and a locked secret door with a red six-fingered hand painted on it. Touching it blasted a servant with black energy and killed him. So did pulling on the handle. So they decided to leave it be.
They headed out the other way out of the temple after determining the painful and damaging scream still warded the altar.
They found a connecting room, with a secret door that they couldn't puzzle out - there was no obvious way to open it, not clear place to put a crowbar, and no triggers for it at all. Hmm. So they moved on.
The found a nearby, wet-floored room with four doors. One was trashed and clearly had been damaged and then shaped shut, but the shaped stone was missing and the walls showed signs of something man-sized digging out. (Dryst correctly discerned this was birthing gargoyles, from a shaped stone wall.)
Some quick checking showed them a way back into the high-ceiling room where they fought the gargoyles, a way into the otyugh pit (where Chuck Morris was almost lured with mental images of how surely there was some treasure in it . . . but he was pulled back by the vets), and the way to the entrance room.
Basically from here they cleaned up their map a bit, and then headed out across the pit guarding the entrance. All was quiet, although the pit was 3/4 full of bound bundles of sticks and there were a few unbundled sticks on the far end. They figure someone was trying to fill the pit but got interrupted. Once they were sure there was nothing amiss about the bundles (not covered in oil, not a trap) they crossed. They lit the pit up as best they could to make it harder to cross again, and headed home.
Once back in town, they spent a day trying to sell their loot - no takers! So they waited for Black Jans's tower to appear. Once it did, they headed in. This time the servants were three gem-eyed beardless dwarves (who called themselves "the Kio" just as his other servants had, and who addressed even first-comers by name.) There was, oddly, also a set of stairs down in the tower as well. They offered up what they had, and one dwarf stayed, one went up, and one went down. They all gathered and announced that Master Jans, Archmage of the First Rank ("I'm only an Archmage of the Fifth Rank" announced Dryst) would buy their goods.
Long story short, they got 90 Gold Sovereigns (a large gold coin sized as the gold eagle), or $9000, for their items . . . but they were cursed for taking them. They could, of course, return them back to the altar, or just to the "nearest religious establishment" for de-cursing. They did that, instead, for a net of 5000 sp for the group. Black Jans was uninterested in the gargoyle geode hearts but they managed to sell the lot for 2500 sp.
It ended up as a profitable trip, even with the cost of expended potions and power items.
* He failed a death check, but he's got Hard to Kill and it was enough to keep him alive and (mostly) ignored by the toxifiers. Not always, since they sometimes chose to lurk near him to cut off escape, inadvertently damaging him further.
Notes:
- Annoyingly, I hadn't noticed since day one that I have two room 8s on the map of level 1. Fixed that. But that took some time, because I tried using Open Office and it crashed whenever I tried to save stuff. Thanks guys, really helpful. I'll install my older version of Word instead. I'd had Starter on there but it crashed out and died, and I wasn't terribly impressed with it. So I tried Open Office and I'm less impressed with it. Lucky for me, I have a multi-license pack for an older version of Word I like a lot and the installation CDs. Crash on me when I try to save in the middle of a session? Uninstall!
- Amusingly, I told my players about the ongoing AOA/AOD uselessness thread on the SJG forums. They scoffed at their uselessness, and true to form, they used both often in the fights tonight. AOA got a hell of a lot of use in the toxifier fight, because there was nothing to defend against - it was a race of killing power vs. killing power. AOD did, too, until they realized they wasn't anything to defend against. The shieldbearer used it to cement his protection of Dryst, and also to block for a fallen Chuck Morris before he got back to his feet.
- this was a first encounter for my players vs. toxifiers, although they met their spiritual relatives in a chaos-tainted castle in my previous campaign.
- Lots of fun quotes today, beginning to end. My favorite is probably "I'm a wizard, I should be useless in a No Mana Zone. I approve of role stereotypes and enforce them." from Dryst's player.
- Purify Air isn't an attack spell, but it was appropriate and made sense as a Toxifier killer. So it worked. Windstorm, I decided, merely drove them back to a lesser or greater degree depending on how badly they failed a ST check. I gave the toxifiers a weakness so they'd take 1d when they couldn't resist.
- I loved the idea of gargoyle hearts being valuable, so I went right with that. 1d x 100 each in value.
- Raggi couldn't buy a HT roll tonight. Still didn't die. He's a tough bastard.
- Know who else is a tough bastard? Vryce has HT 14, and that's why he didn't die tonight.
- I love that Dryst calls one of the gargoyles his "son" and wants to recruit them.
- Toxifiers have a 2-hex radius attack. I wasn't sure if that was their hex plus the surrounding ones, or their hex plus the 2 surrounding them. I went with the latter, because DF is supposed to be tough.
- My players referred to the temple area as a sub-level. That's interesting. What is a sub-level, anyway? To me, it implies a separate map, and a level that's effectively contained "within" another level (all access points are to and from it), but which needs a new sheet of map paper to deal with. They figure it's an area not deep enough to be considered a new level. Who is right? I'm not sure it matters, but it's interesting. Neither definition makes the other objectively wrong, and I can see why it makes sense to call the temple area a sub-level even if I hadn't.
- I'm glad they finally connected back up to the front door again. Not a lot of exploration tonight, or a lot of fights. But two big tense and fun ones, and some critical understanding of where they are in relation to where they've been.
Good game.
Saturday, June 8, 2013
Alternative Turning in GURPS Dungeon Fantasy
True Faith (with Turning) is a 24-point win button against undead. Or anything else subject to turning. Concentrate, win the Quick Contest, and you can easily force the undead back and push them into corners where they can be killed by your allies. Will is only 5/level, and getting bonuses isn't hard, either - +1 or +2 for good holy symbols are almost automatic for a cleric. This makes undead difficult to use effectively against a cleric with this power.
Douglas Cole has complained about his own prayer powers for his Warrior-Saint, Cadmus, who presses the win button of his anti-evil aura and the bad guys flee.
Here is another option - treat it the same way I treat fear in my games (originally griped about here.) If you fail to resist a fear-based attack, you suffer a -1 for every point you fail by for any action that isn't running away from what frightened you. That includes resistance rolls, making for a "fear spiral" if you don't leave quickly. Once you're out of the range of the fear attack (around a corner, out of sight, etc.) you can try to recover by making rolls against the original base resistance; every point you win by strips away one point of your fear penalty. Once it's zero, you're all calmed down.
In this case, True Faith (w/Turning) would cause -1 to all rolls other than those to help fleeing the cleric.
True Faith (w/Turning) (Modified)
To use this, a cleric must take a Concentrate maneuver. Presenting a holy symbol will give its usual bonus. Roll versus Will plus any bonus vs. the Will of any undead. For each point they lose the contest by, they suffer a -1 to all actions whenever they are within a number of yards equal to their margin of defeat. There are two important clarifications:
Mindless undead always run, stay outside of the protection radius of the cleric. If unable to flee, they can fight back but suffer the full penalty from their loss in the contest.
Willful undead may choose to run, or to stay within the radius of the cleric and suffer a penalty equal to their margin of failure in the contest.
Penalties last until 1d6 seconds after the cleric stops concentrating on Turning.
For example, Inquisitor Marco has Will 15, Power Investiture 3, and a high holy symbol (+2). He faces four zombies (Will 10) and a vampire (Will 16). He rolls a 12, making his roll by 15+3+2-12 = 8 points. The zombies roll 10, and lose by 8. The vampire rolls a 12, and loses by 4. The zombies are at -8 and flee. The vampire is at -4, and can either continue to act normally at -4, or attempt to flee at least 4 yards from the cleric; once there he is no longer at -4 (but will be again if the cleric closes with him, or he moves closer again).
Basically this gives powerful supernatural critters the chance to shrug off the turning and bull through, but still gives them a reason to back off from a cleric presenting a holy symbol.
You can set a ceiling, though, and say that the maximum penalty is -X (say, -10) and that after that all undead must flee.
I've tried this with fear in actual play, and it works fine (you can see it in effect here.) I haven't tried it yet with Turning, but I'm considering doing so. To balance out the reduced effect, it might be nice to add some other effect, or perhaps just reduce the cost increase from +60% to something like +40% (21 points). I haven't tried either of those. Mechanically I think it's workable, but it's setting the appropriate cost on its nuanced but reduced effects that I'm unsure of, yet.
This works better for combat-heavy games like DF, and less well for games of supernatural fear where a lowly but faithful priest might drive up a monster with a crucifix held high.
Friday, June 7, 2013
Sneaking in a Dungeon, Part IV (Bonus Part) - How often to roll?
So if you're sneaking in a dungeon, how often do you roll?
A good discussion of that very question came up on the SJG Forums.
Here is the thread in question.
Basically, the more rolls you have to make the more chance of failure. A blown Stealth roll means you're not being stealthy, and makes for a very easy chance of detection. Making a PC make a lot of rolls basically can amount to "roll until you fail."
My approach is, roll once, and then only roll again when the circumstances change.
I explain it a bit here, along with the idea of preserving a single roll, and just changing the modifiers as you go. How does that idea work? It involves tracking your modifiers and your scores.
For example: Guard has Per-12, and makes his roll by 2. You have Stealth-14, and roll a 9, making your roll by 5. You have a net margin of success of 3. You can get within 5 yards of him before your margin of success is 0, within 5 yards before it's -1 and he's heard you. Whether he recognizes the sound for what it is, or can react before you see him notice and do something about it, is another question.
The downside to this is that you basically know how sneaky you're being, and how close to try to get. Even if you don't know the margin of success, you know it's no better than (whatever number you succeeded by). So this can discourage people from moving close on a bad roll. Conversely, it may encourage risk taking with a high roll, because they don't know if the guard made his roll or not, nevermind the margin of victory.
As far as a more official person's opinion, Sean "Dr. Kromm" Punch put up two responses, that boil down to "keep your roll until your circumstances change for the worse." In other words, when things change for the worse, roll again. Otherwise, you're good.
Kromm responses are here and here if you want more detail.
I second any ruling that makes you roll less, and which keeps tension up (how close can I risk getting with this roll I made?). So keep the total rolls down, roll when it gets worse.
Thursday, June 6, 2013
GURPS Melee Academy: Berserker's Wingman
Welcome to the June installment of Melee Academy! For more, please check Team Tactics 101 over on Gaming Ballistic and Fundamental Tactics Principles on No School Grognard.
Berserkers can be tough opponents, but also tough allies. They're vulnerable to attack, they can often get out ahead of a defensive line, and they can't actively avoid injury.
So how can you keep your berserker buddy alive?
Defend For Him - A berserker has no defenses, but that doesn't mean he's defenseless. Not with a wingman. That's where you come in.
Sacrificial Parry - If you can get this perk, found in DF11 and Power-Ups 2, you can parry for an ally beside you.
The longer and better your weapon is for parrying, the better. For one-handed weapons, your best bet is usually a rapier (Reach 1,2). Any two-handed weapon covered by Parrying with Two-Handed Weapons (GURPS Martial Arts, p. 123) is a great choice. They generally have a good reach, solid weight to avoid breakage, and give excellent multiple parry cascades (-2 instead of -4). The king of these is the quarterstaff. +2 to Parry and the upsides of two-handed parries and Reach 1, 2 means you can cover the berserker pretty easily.
With this perk, you're going to want to stand within 1-2 yards of your berserker buddy. In general, advancing a little forward of the berserker is the best plan - you want to be within reach when he's attacked. Remember that a Move action leaves you all of your defenses intact - this is handy if your berserker can outpace your Step (which is generally pretty easy). You might want to forgo any action except moving to a good place from which to defend the berserker.
Sacrificial Block (from DF15) will allow you to stop a shield attack if it passes toward your berserker friend in your rear. You'll need Shield Wall Training to stop ones when he's to your side, but that also comes with the ability to cover him if he's to your side. A large shield and this pair of perks is your best option, really, because you can effectively intercept any attack near you or through you.
Sacrificial Dodge is your least good option. It's more properly "Sacrificial Dodge-and-Drop" and if you pull it off you take the hit and you end up prone. Pull this one out if you have to, but it's not one you want to depend on or have to use except in extremis.
Clear Attackers From Him - The fun part. Killing those who can threaten your berserk buddy.
Your goal on your own turns is to kill those opponents who can deal the most effective blows against the berserker. Who that is exactly varies. Evaluate them in light of what they can do to your ally.
Again, you want to stay close. Don't stray too far from your berserker ally to get a kill.
Given a choice of targets, leave the most offensively weak opponent alive.
Given a choice of targets, cut down the ones most able to interrupt the berserker (killing anyone attempting a Stop Thrust, for example) or able to put him to the floor (opponents reasonably capable of inflicting a crippling injury).
While it can be tempting to finish a stunned opponent, if there is an enemy that is more threatening to your berserker ally, hit that opponent first. A stunned opponent will spend the next turn on a Do Nothing maneuver recovering from stunning, so there is no attack coming from there. If there is a more threatening target, attempt to take that one down.
One thing to consider is softening up the berserker's target. You can do this the old fashioned way (attacking him to try and injure or kill him), go for a disarm (pretty low percentage, most of the time), cripple a limb, etc. - but you can also Beat or Feint. A Beat can be taken advantage of by anyone, including your berserker friend. Taking advantage of Feint requires that you both have the Teamwork perk - a smart buy at 1 point if you're planning to routinely fight as a pair. It's an open question if you can stay "formed up" when you're Berserk. You certainly can't take the Ready action needed to form up in the first place, but it's a GM's call if you stay formed up once you go berserk. If so, staying adjacent to your berserker buddy should be enough to keep you so.
Passively Block Attacks - this is simply a matter of positioning. Put yourself between foes who you can defend against but who will effectively be able to attack the berserker. If you can do so, you can prevent opponents from using Step and Attack to get the berserker and instead need to go for All-Out Attack (leaving them open to attack), Committed Attack (Extra Step), using Extra Effort for a second step, or Move and Attack (greatly limiting their attacks and weakening their defenses). This is simply putting yourself between the attackers and the berserker.
It works pretty well for missiles, too - there is a steep penalty for shooting through occupied hexes.
Leave a clear target - the berserker is going to need someone to kill on his turn. So leave him a clear target, especially one that won't take so much running that he'll get too far away from your passive and active protection. So do your best to set up a clear channel for him to advance through and attack.
This can be tricky, and it's wildly situation dependent. But ideally, you want to leave a target that is:
- relatively close to the berserker - within 1/2 Move, so he can all-out attack. Beyond that range the berserker must take a Move action or attack with a ranged weapon (20+ yards away). Since your goal is to keep the berserker close, you want to leave someone alive for him to attack within 1/2 move.
- easy for the berserker to kill, disable, or stun on his turn, so as not to suffer retaliation.
- isolated, yet in line with the next turn's potential target.
Remember, your overall goal is to win the fight, not shunt the berserker off into a tactically unimportant flank. That'll do if you want to preserve the berserker at all costs, but not if you're just trying to use him most effectively.
What Berserk Isn't - Berserk puts a character into a battle frenzy, and limits his actions. But there are some things it isn't.
A berserker is not automatically battle-blind. It's often proposed as being such, but nothing in the text says a berserker loses any use of Tactics, clever strategy, etc. The actions of the berserker are highly limited, but within those limitations they can do smart things. Remember, a beserker gives no thought to defense, but it says nothing about giving no thought to his offense. Ignore the guy attacking them to kill a different (but more vulnerable) target, choosing the most effective attack option against the targets presented, choosing the best path of movement that still allows for an attack. Remember that with multiple targets within reach of an All-Out Attack, nothing says the berserker must attack the closest target. It just says ". . . you must make an All-Out Attack each turn a foe is in range." So if a tough target is next to you and a totally sweet target is slightly further, and you can reach that second target, he's valid. The berserker is berserk, but hasn't become mindless or stupid. Just frenzied.
Also note that Berserk is quite different and separate from Bloodlust. With Bloodlust, you need to go for a killin' shot and put in an extra shot to ensure a downed foe is dead. Berserk on its own lets you change targets (subject to the limits noted above), snap out of it after a foe is downed, and says nothing about pounding a downed target to make sure he's dead. If you've got Bloodlust and Berserker, you'll suffer both limitations - and your tactical choices will be pretty small.
Finally keep in mind a berserker who runs out of enemies might not snap out of it, and need to be put down. But that does not mean they attack close friends before distant enemies. So it's not unsafe to stand close to one, although you aren't going to get any direct defensive support.
Think of yourselves as a team - it's not what your berserk buddy does on his turn, or you on yours, that counts compared to what you manage together.
Subscribe to:
Comments (Atom)
