So I did find a King Tiger after all.
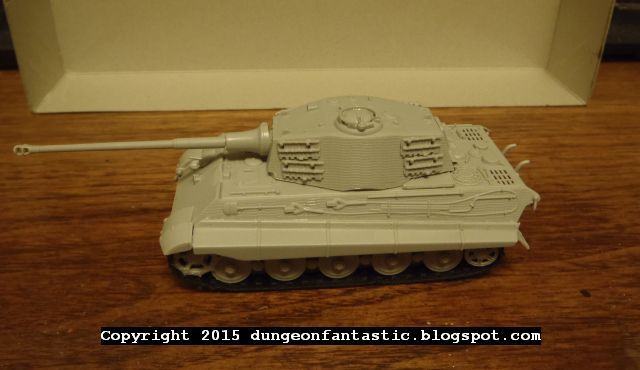
It was reasonably priced on Amazon.com, from a company called Trumpeter. Production turret (aka the Henschel turret), Zimmerit coating. I think that means I can't paint it Bulge-era, because I have pictures of Tiger IIs from that operation and they don't seem to have Zimmerit.
I have a bad habit of getting things to build or paint and then putting them away. So this one hit my desk and I immediately starting putting the road wheels together. Before I knew it, I'd gotten most of the tank completed.
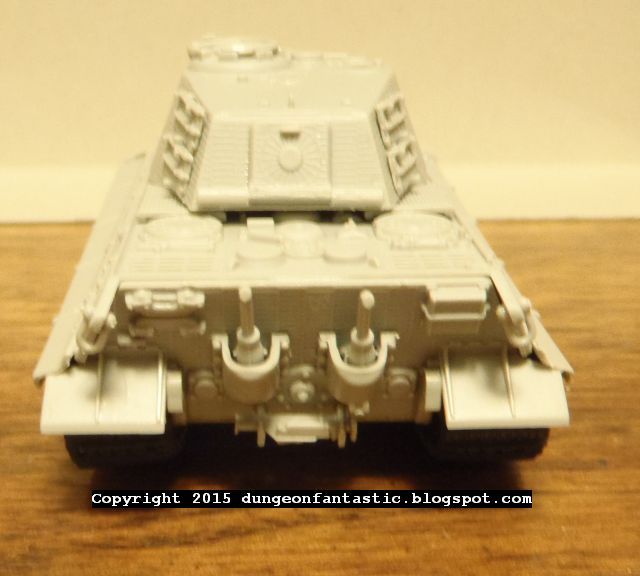
One nice thing about the internet is that I hit a snag attaching something to the back of the Tiger. I honestly wasn't sure what it was, and it wasn't clear from the instructions which way to face it (there were two choices, depending on how you hold it.) So I simply looked for full-size pictures of the back of a Tiger II. Voila:

(click to enlarge)
Aha, it's a jack! I glued that sucker right on.
And I managed to bang out the rest of the model today, having done half yesterday (the day it arrived), and left it all to dry.
The treads were tricky, though, since none of the glues I had seemed to work. Plus, they are just short enough you need to stretch them over the tracks. That's bad if you want them to hang on top and run across the top of the road wheels. So I followed this tutorial to put them on:
Armor/ AFV model workshop 81: Tank tracks attachment tutorial
The only thing is, since the armor skirts cover the top of the track, I fed the closing halves into the top part, glued them, and held them down with toothpicks until they dried as a unit. It was tough because one of the bogey wheels was bent and I slightly mis-aligned a toothed wheel. But it worked well enough, and you can't tell unless I point it out.
Panzerkampfwagen VI Tiger II Ausf. B
Königstiger

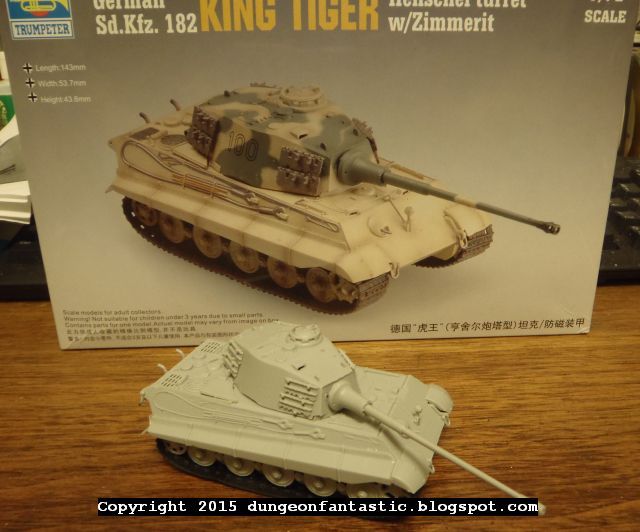
It's looking good. I'll try to figure out how to paint it - probably just duplicate the paint scheme from an intact real one, or if I can find a good color photo of one from WWII I'll copy that.
I probably should have primed it and painted it and then put the treads on, then the side guards, but I couldn't see how. I may just have to be very careful and be ready to remove paint if I get it on the treads.
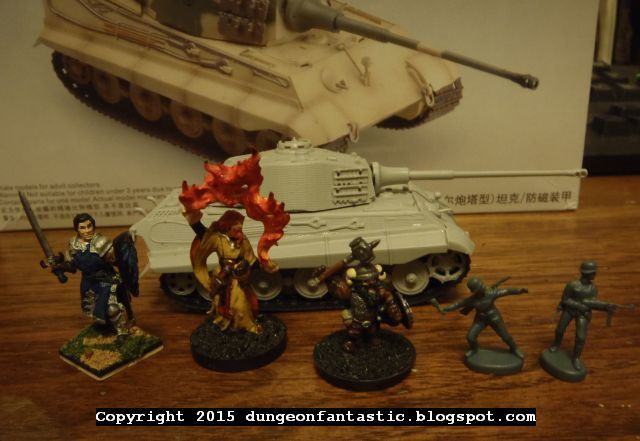
This picture shows why I say I won't use these with my fantasy guys. Even if I had the inclination, it's too small. A real Tiger II is more than 10' tall. I posed some actual 1/72 scale humans with it so you can see what I mean. It's just not intimidating if a 88mm/L71 gun is less than twice the length of the wizard's staff.
This is actually the first complete hard plastic model I've ever done, that I can remember. I did snap-tight models in the past, and I'd get ship models and put the main bits together and play with them. But I never did fully assemble a a model properly. I have some partly-done ones I need to finish (next up, perhaps, is an Elefant, but I may buy treads for it to avoid assembling track link by link.) I had a lot of confidence, though, thanks to all of the Warhammer models I've put together for props in my games.
No, I have no idea where to put it now that it is done. I guess I need some kind of 1:72 scale display box for it.

Well done! I don't know what it is about tracks - be they rubber or hard plastic, they never seem to go on "quite right". When I played Warhammer 40k, I think exactly one vehicle did it right, as did the Rhino from my recent miniatures post.
ReplyDeleteI've a tank myself in the miniatures pipeline when I find some time (15mm, surprise surprise), but I'm fortunate in that at this scale tracks are cast in place.
Looking forward to seeing yours painted!
Cheers!
At least with rubber/molded tracks, it's less hassle to get it wrong. The Elephant I pulled out of the pile needs 7 individual links just to get around the front wheel, and a half dozen larger sections. Probably looks great if you don't slop on too much glue and put them in wrong . . . but that's where my skill level is at.
DeleteI liked your massive minis post, too.
Cheers! If memory serves the 40k kits had a long one for the top of the tracks, a shorter one for the bottom, and 6 (one small, two really small per bend) parts. On some of them it's too few, and you end up with a 45 degree bend right around the road wheel. Smaller pieces would be higher resolution, but that could be super fiddly for sure.
DeleteFor the paint job I'd go with woodland camo, unless you've got an Afrika Korps thing going on... http://www.ww2incolor.com/d/201946-4/Tiger+II
ReplyDeleteIf I could find a snow-camo one from the Ardennes with Zimmerit, I might just go for snow! But like I said, the pictures I have from the Ardennes '44 all show smooth armor.
DeleteZimmerit was out of production by the autumn of '44. Ardennes was shortly after, so it's entirely possible all existing ones got scraped. There was concern that the material would catch fire if it got shot by something else so it wouldn't surprise me if it got filed/sanded/scraped off.
DeleteFound this; might have a solution: http://worldwartwozone.com/forums/index.php?/topic/15195-question-about-camo-on-panther-g-tanks-during-the-ardennes-offensive/
DeleteThanks Michael.
Deleterecommended by the rarity of seeing :http://einealtekriegsspiel.blogspot.com.ar
ReplyDelete